
Lately I’ve been drawn to skirts/dresses with longer hemlines, which made me notice a gap in my wardrobe- a long coat. The longest one I own hits at mid-thigh, which looks really weird with the midi-length styles I’ve been wearing. I decided to make a long black duster, which could be worn all year round.
I looked at quite a few different patterns and considered making both the Named Isla trench coat and the Folkwear Model T Duster, but the Seamwork Quince robe won in the end, as it has a simple construction and I have lots of unused Seamwork credits!
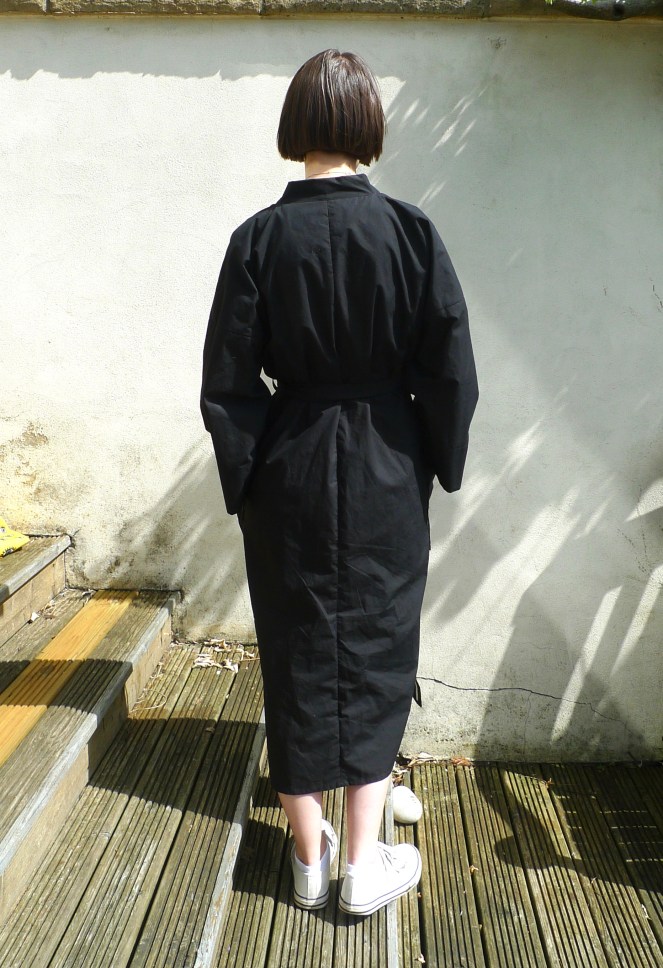
Here’s how it turned out:
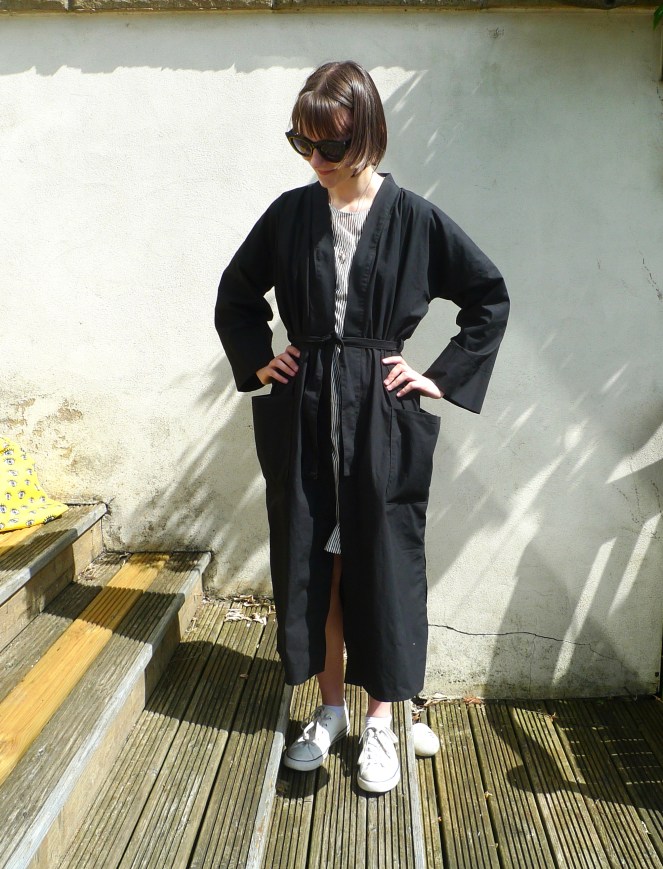
For the fabric, I chose this Japanese Poplin from Merchant and Mills. I wanted to avoid it looking too much like a bathrobe, so I deliberately chose a more structured fabric over a drapey one. I’m really happy with how crisp the finished coat looks- still slightly robe-like, but in an elegant way! I have a feeling this fabric will become even lovelier with wear.

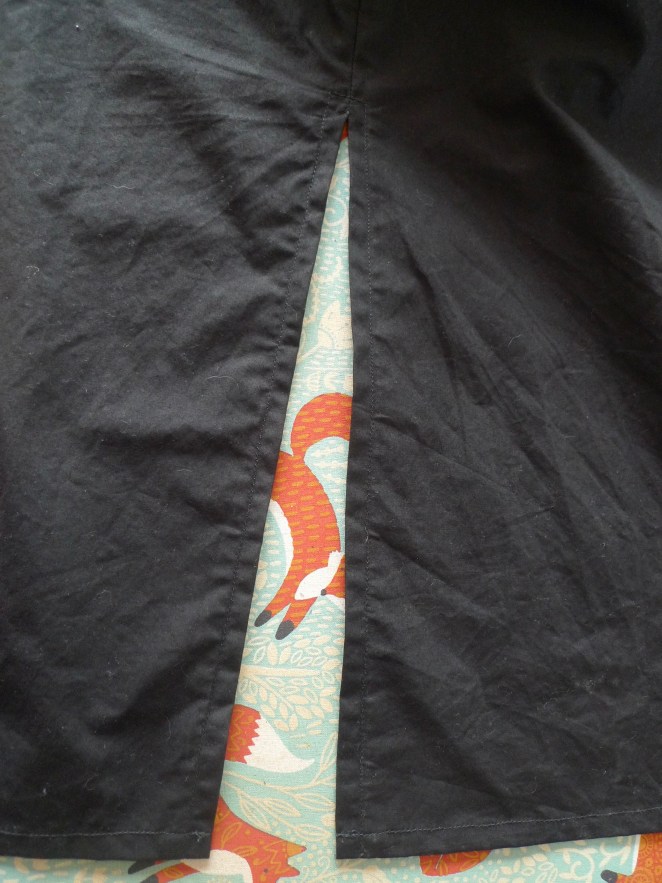
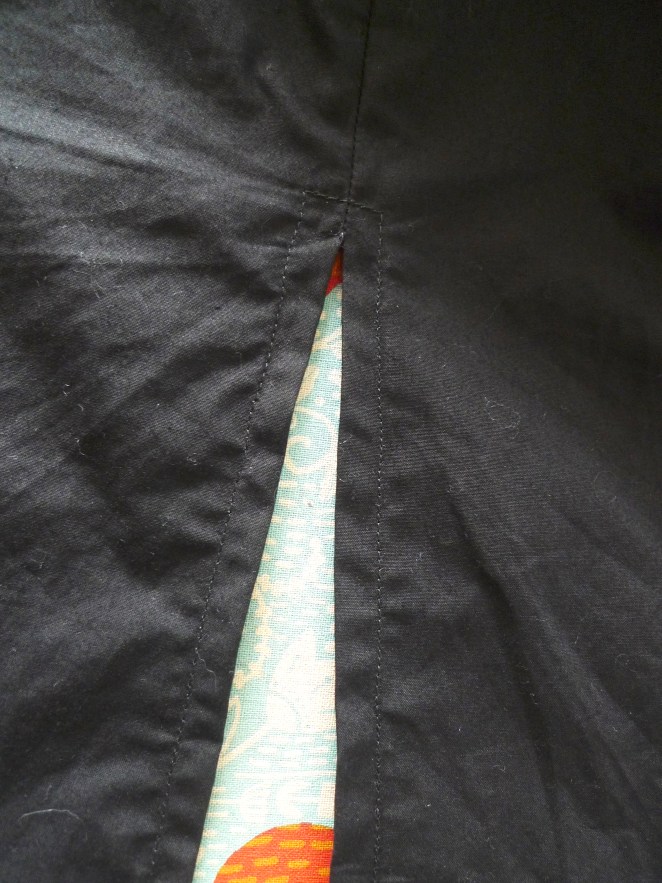
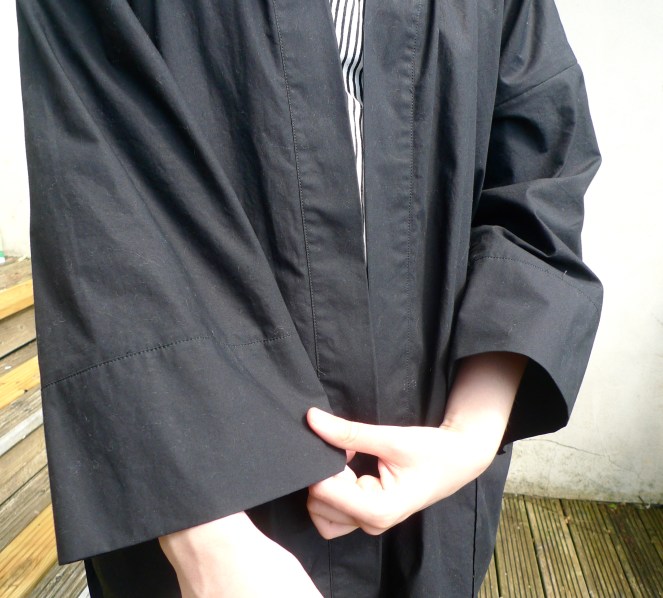
To make it look like the duster coat I imagined, I lengthened it to finish mid-calf, and added side splits. I originally planned to follow this faced side split tutorial from the corresponding issue of Seamwork magazine, but in the end I decided to keep it simple and just topstitched the seam allowances down, like this:

One of the draws of this pattern was how easy I thought it would be to fit- this was not the case! I’m so glad I made a toile (normally I’d skip it for something this loose-fitting, but the fabric was expensive so I made one just in case) as there was quite a major fitting issue across the upper back/neck area. Here’s the original toile:
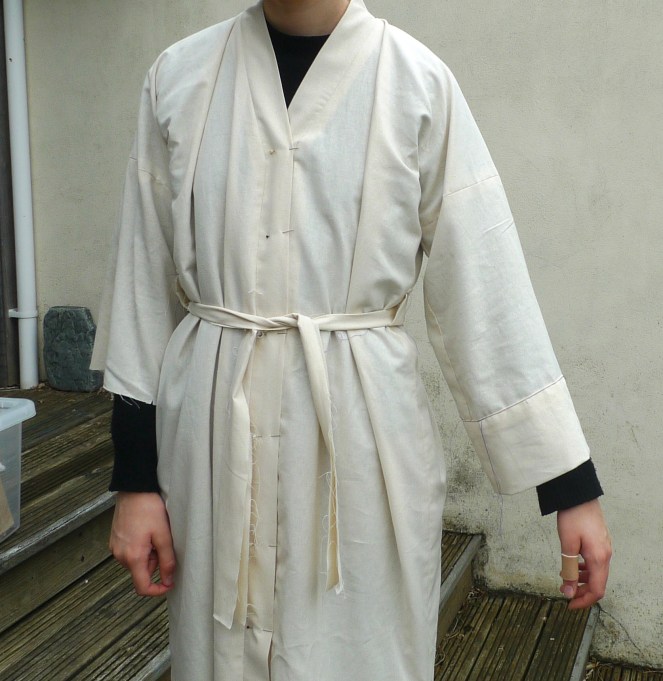
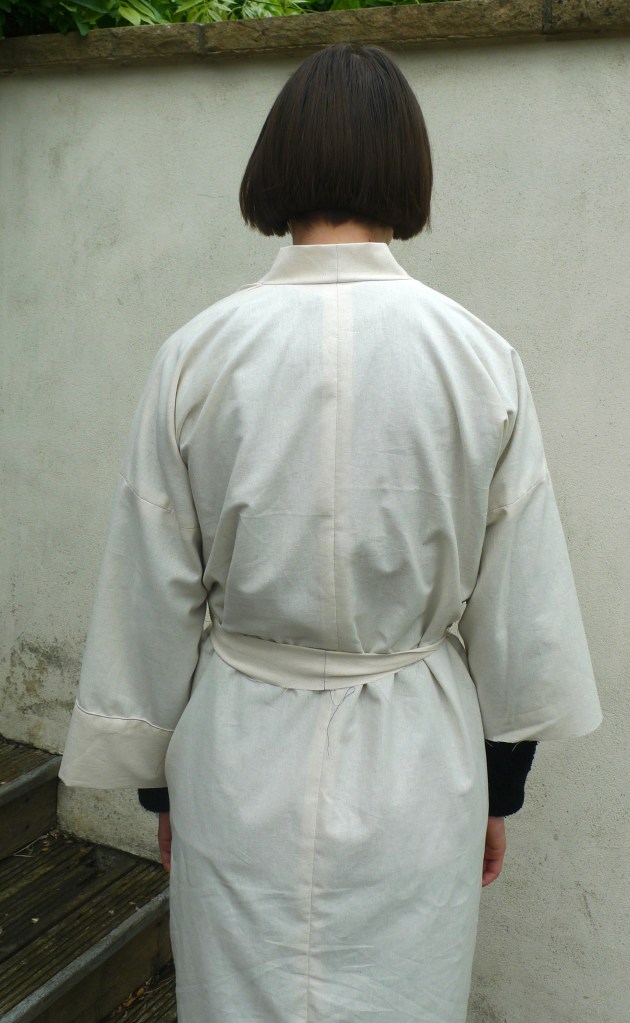
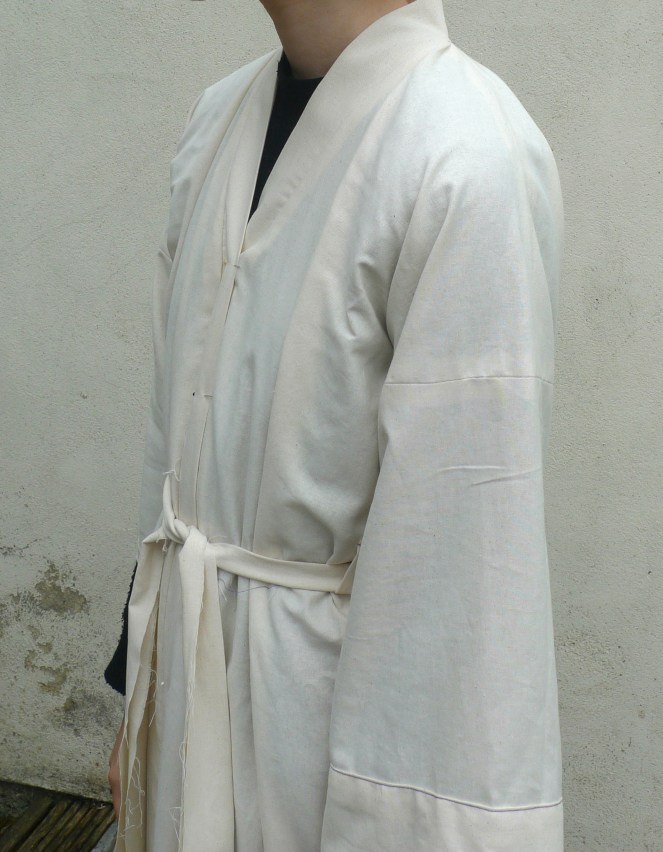
The fit issue I’m talking about is shown by the big fold of fabric on either side of the front torso, emanating from the top of the shoulder seam. I decided this was caused by the robe being too tight over the back neck area, which would also explain why the shoulder seam was sitting so far back.
I was completely clueless as to how I should fix the issue, so I tried doing some random slashing and spreading thing across the back neck. This got rid of the fit issue, but I couldn’t figure out how to transfer it to the paper pattern pieces and ended up getting all muddled and stressed.
Eventually I asked for help from a very lovely, more experienced seamstress I know. She said I was on the right lines, and pointed out another issue; that the underarm was too tight. With her help I altered the paper pattern like this:
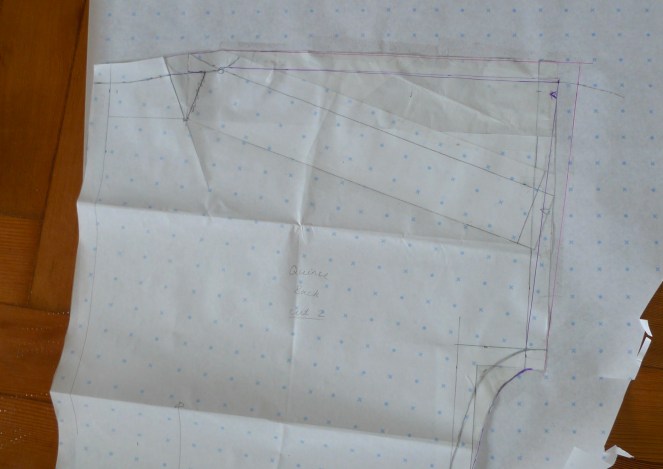
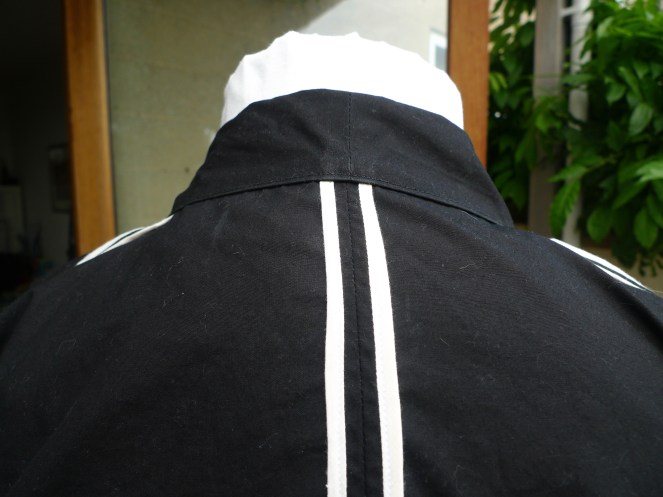
As you can see, I added a wedge to the back neck- the messiness around the shoulder is the knock-on effects of this. I was surprised that a wedge as small as this had such an impact on the rest of the pattern piece. I probably should have added even more, but I was worried I’d make a mistake and it wouldn’t line up with the other pattern pieces, so I left it.
I also added to the underarm. I find it odd that in the original pattern the underarm is a right angle, as I think the seam allowances would be easier to deal with if it was a soft curve instead.
Then obviously I had to think about the ‘snowball effect’ of these adjustments; in this case that meant adding length to the neckband and altering the underarm in the same way on the front pattern piece.
Honestly, I don’t think these adjustments did much to correct the fit issues, but at least the coat feels more comfortable now.
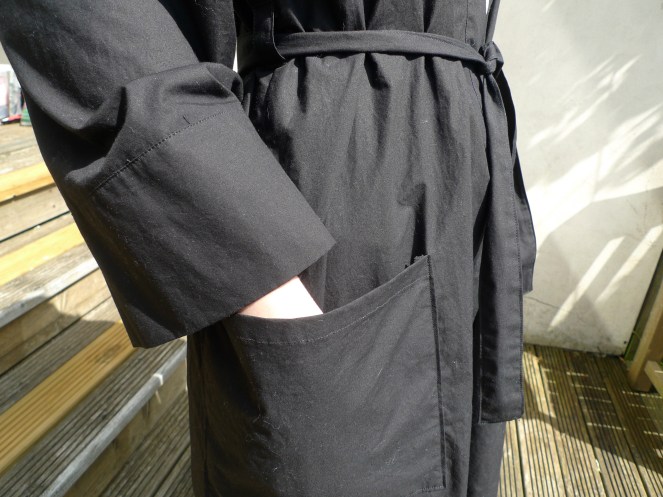
A couple of minor changes I made in addition to the fit adjustments: Lengthening the sleeves by a few centimetres, and significantly lowering the pocket placement, so it was actually at ‘hand level’.
Now for my favourite part: the CONTRAST SEAM BINDING!!! Here’s what the coat looks like inside-out:
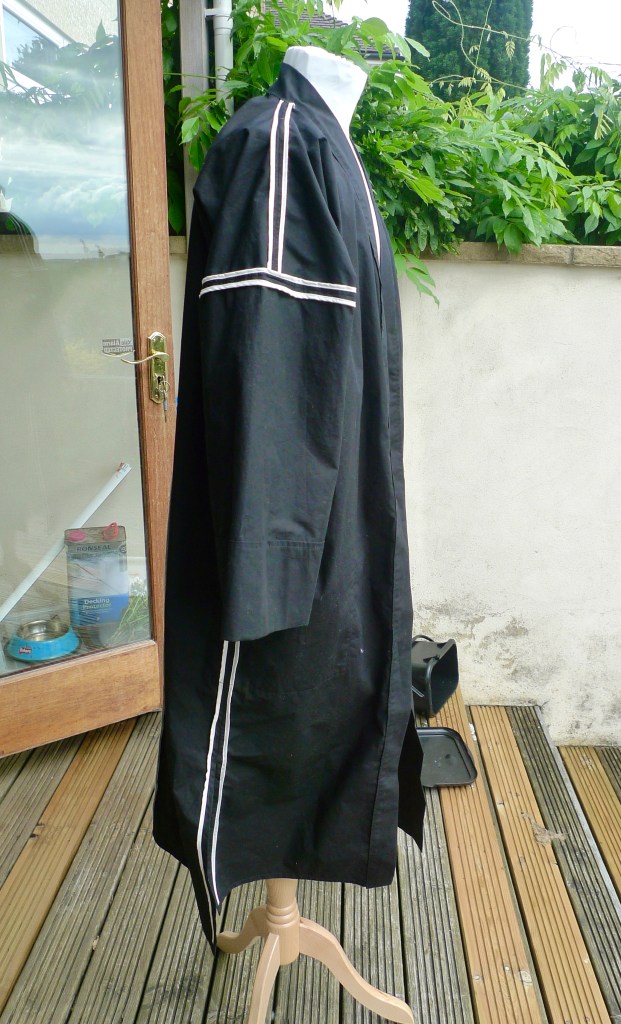

I used cream bias binding on all the seam allowances, which took forever but was totally worth it. When the wind blows, you catch a flash of white at the side splits, which looks AMAZING (if I do say so myself). I’ve never used binding on seam allowances before, so there was a bit of a learning curve, but for the most part it looks neat. When I was planning this coat, the black fabric and cream binding was one of the first things I was certain about.
There are so many things I love about this coat…
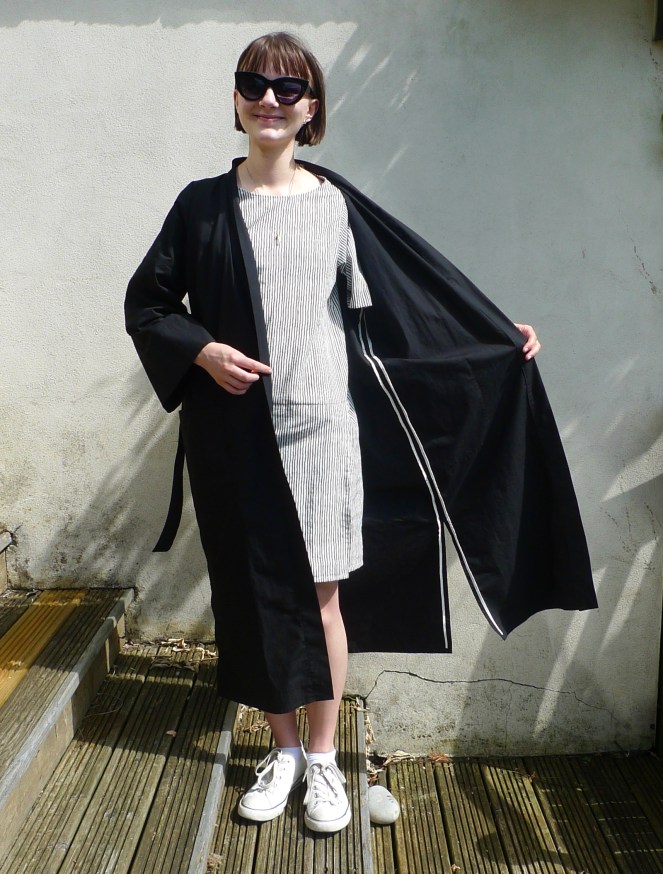
The super wide sleeves, side splits and general swishiness make me feel like I’m in a dramatic movie scene! I’ve also grown to love the way the pockets stick out at the side- I think it gives the coat an interesting silhouette.
I’ve definitely achieved my goal of making a coat I can wear all year round; in Spring I can wear it as a light outer layer, and it’s loose enough to fit a jumper underneath in Winter. It’s my dream coat!

Pattern: Quince day robe by Seamwork
Size/Fit: I cut a size 0 and added a wedge to the back neckline, added to the underarm and lengthened the sleeves.
Fabric: Japanese poplin from Merchant and Mills
Sewing Time: A few days of intense sewing. The only reason it took this long was applying all that bias binding (almost ten metres of it!)
Quality of instructions: Very clear.
Difficulty: Beginner, this is a super easy pattern.
Adjustments/Hacks: Lowered hemline, added side splits, lowered pocket placement, lengthened sleeves, plus fit adjustments listed above.
Make again? Probably not, unless I figure out how to fix the fit issue. If I did make it again it would probably be as a robe, not a coat.

One thought on “Seamwork ‘Quince’ duster coat”