
Confession time: these are actually all presents I made last Christmas! Yes, this is how slow I am at writing blog posts… Anyway, I wrote it eventually, and I thought I may as well share it, even if it is several months late (hence the vague, non-seasonally-specific title).
I love giving people handmade Christmas presents; they’re so much more personal than anything you could buy in a shop, and they show that you’ve put a lot of thought into them. Here’s what I made this year:

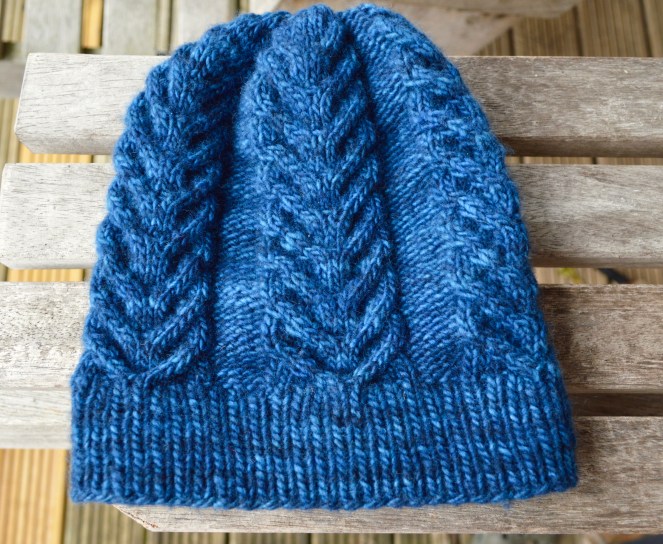
Firstly, I knitted a hat for my neighbour. I wanted to make something with cables so it would be warm and cosy, and I eventually settled on the Antler Toque by Tin Can Knits. The Antler Toque is a free pattern with a very simple cable- simple enough to do in front of the TV, one of my main criteria in choosing patterns! The recipient requested a ‘mid blue’ colour, and as I wasn’t quite sure what this meant I chose a yarn with some variegation in it; Malabrigo worsted in the shade ‘Azul Profundo’.
This yarn is lovely and soft, but I found it difficult to knit cables with. It’s a single ply yarn and therefore has very little stretch, which made all the manoeuvring and shifting of stitches you have to do with cables feel awkward. This may also have been due to the needles I used: Knitpro Cubics in Rosewood. I’m not a fan of these needles. They’re too matte for my liking, and I find the square shape annoying, but they were the only ones I had to hand.
Although I didn’t enjoy knitting it, I’m very happy with the finished product, and so was the recipient! The subtle colour variation works perfectly to highlight the cabled texture, as does the yarn’s slight sheen.
Now onto gift no. 2…
This wasn’t originally intended as a gift; I actually made these gloves for myself, but accidentally made the wrong size and they turned out way too big for me, so I gave them to my dad as an early present! I used another free pattern, the Basic Soft DK Mitts by Schibbot Garn. I spent a lot of time choosing my perfect yarn- hence why I was a bit crushed they didn’t fit me- and settled on Julie Asselin’s Leizu DK base in the shade ‘Keep Me’ (only just got the irony there!). Lately I’ve been obsessed with neutral yarns that have rich flecks of colour in them, and this colourway is particularly beautiful.

Having said that, I was disappointed at how much colour pooling there was. It was so bad on the first mitt (the one on the right) that the flecks of colour almost formed a solid diagonal stripe through my knitting. I’m sure some knitters like this effect, but I’m personally not a fan. Luckily it didn’t happen on the second mitt though.
My dad is a sketcher and uses watercolours a lot when he’s out and about. These gloves are actually perfect for sketching because any paint that gets on them blends into the colourway!
I found the pattern very easy to follow; even the thumb, which I struggled with the last time I made gloves, was simple and straightforward.
I followed the pattern as written, except for the ribbing, which I did as a 1×1 twisted rib to show off the yarn’s sheen.

For my mum I was also going to make a pair of mitts, but she saw this pattern for a tiny knitted cat in one of my books and fell in love with it, so that was that. To make it extra cute I sewed a tiny sleeping bag for it as well!

The pattern is from the Dorling-Kindersley Bumper Book of Knitting, which I’ve had for ages and generally find to be pretty useless. I think this is only the second pattern I’ve ever made from it. None of the garments are things I would wear, the instructions are very brief and the difficulty ratings aren’t very accurate in my opinion. However, for an extremely simple pattern like this it was fine.
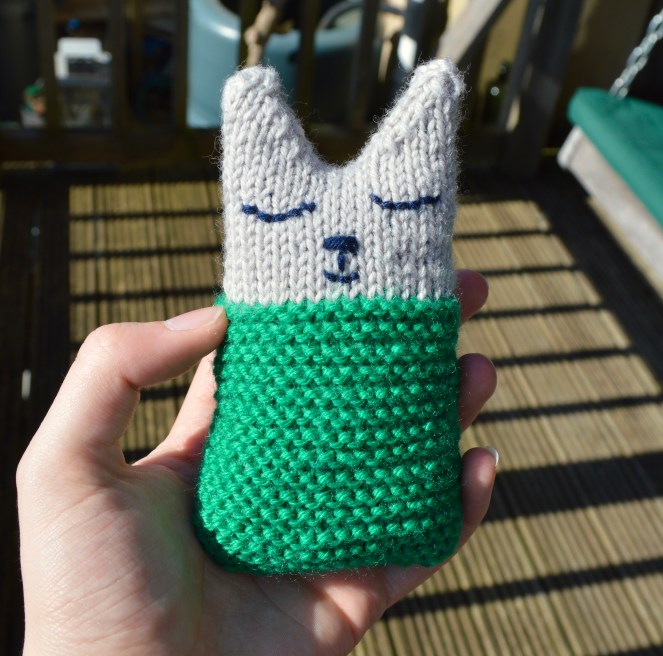
The sleeping bag is self-drafted, basically just a folded rectangle. I measured the toy’s height and width (including it’s width from the side as well as the front) and used this to work out what size the rectangle needed to be. It’s folded at one end to form the actual bag, and folded at the other end to form the pillow.
Here’s a brief description of what I did:
First, I finished both of the short edges with my overlocker. I pressed both of them under by 1cm (this allowance was included in my calculations, as was the seam allowance).
I then ironed the horizontal folds for the sleeping bag and the pillowcase, right sides together, and sewed up the sides of them to create a pouch at either end of the rectangle. I trimmed the corners and turned the whole thing right side out.
Finally I finished the pillow. I topstitched the base of it closed, leaving a small gap to put the stuffing in (I used fabric scraps to stuff mine). Finally, I topstitched over the gap I left to close it.

I really enjoyed giving handmade presents this year, but it was a relief when Christmas was over and I could get back to sewing and knitting for myself once more!
