
I made the original version of Sarah Kirsten’s Morning Glory top a few weeks ago, using some cheap polycotton, and really enjoyed the process of making it. Sarah gets you to draft the pattern yourself, straight onto the fabric, based on your own measurements (so it’s guaranteed to fit perfectly!).

Whilst I loved my finished top, I wanted a more practical and less revealing version that I could wear with a bra. I’d seen some wrap top versions floating around the internet, but couldn’t find any tutorials on how to hack it. So, I made up my own!
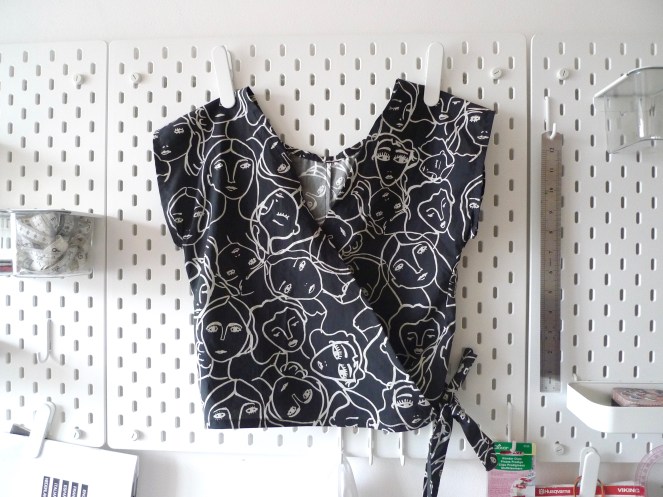
Here’s what the finished wrap hack will look like:
What you’ll need:
- The original Morning Glory top pattern (free download)
- Fabric (how much you’ll need depends on what size you are and how long you want it to be; I made mine out of some cotton lawn leftover from a previous project)
- A popper fastening
- Pattern paper or something similar (e.g baking parchment)
- Basic sewing kit (obviously)
Also, sorry in advance as I do switch between metric and imperial measurements sometimes! (The original pattern uses inches whereas I’m British so have always used centimetres)
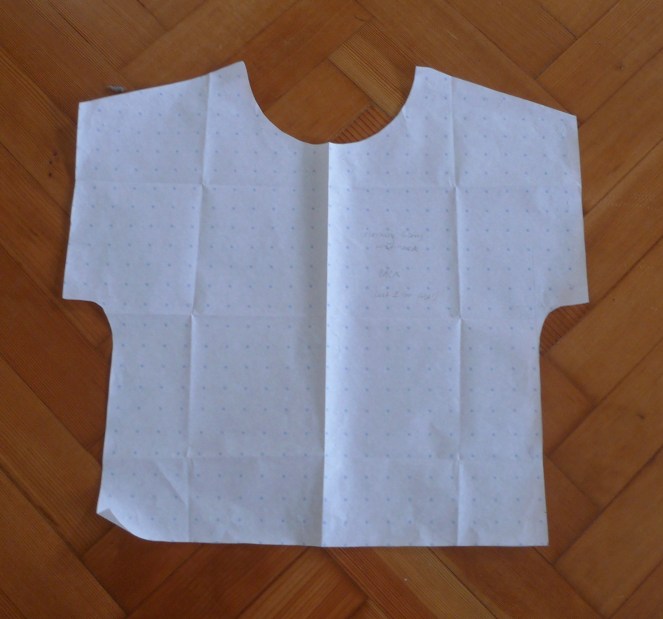
1- Follow the instructions up to step 7, but using the pattern paper instead of your actual fabric. The original pattern is ‘paper-less’, but we will be making a paper pattern. I find the next steps easier if I’m working with paper rather than fabric, plus it makes the pattern easier to replicate if you want to make another one! The piece you have just drafted will be the back piece, and should look like this:
2- Follow step 7, but continue to use your pattern paper rather than the fabric, and only cut from one layer of paper. Also, where it says to make the new piece with a width of 1/2 W, make it with a width of 3/8 W instead. (If 3/8 W comes out as a decimal, round down rather than up. For example, mine came out as 15.375″, so I rounded down to 15″) The piece you have just drafted will be the shorter side of the wrap front, and will sit underneath the other side when worn.
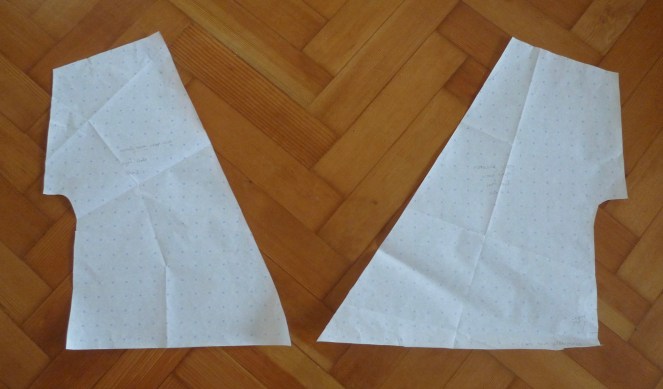
3- Flip the back piece over and follow step 7 again, this time making the width a few inches smaller than 1/2 W. For example, 1/2 W for me is 20.5″, so I used a width of 18″. This will be the longer side of the wrap front, and will sit on top when worn. The two front pieces you have just drafted should look something like this:
4- You may want to add these markings to your pattern pieces, to help you remember these things later:
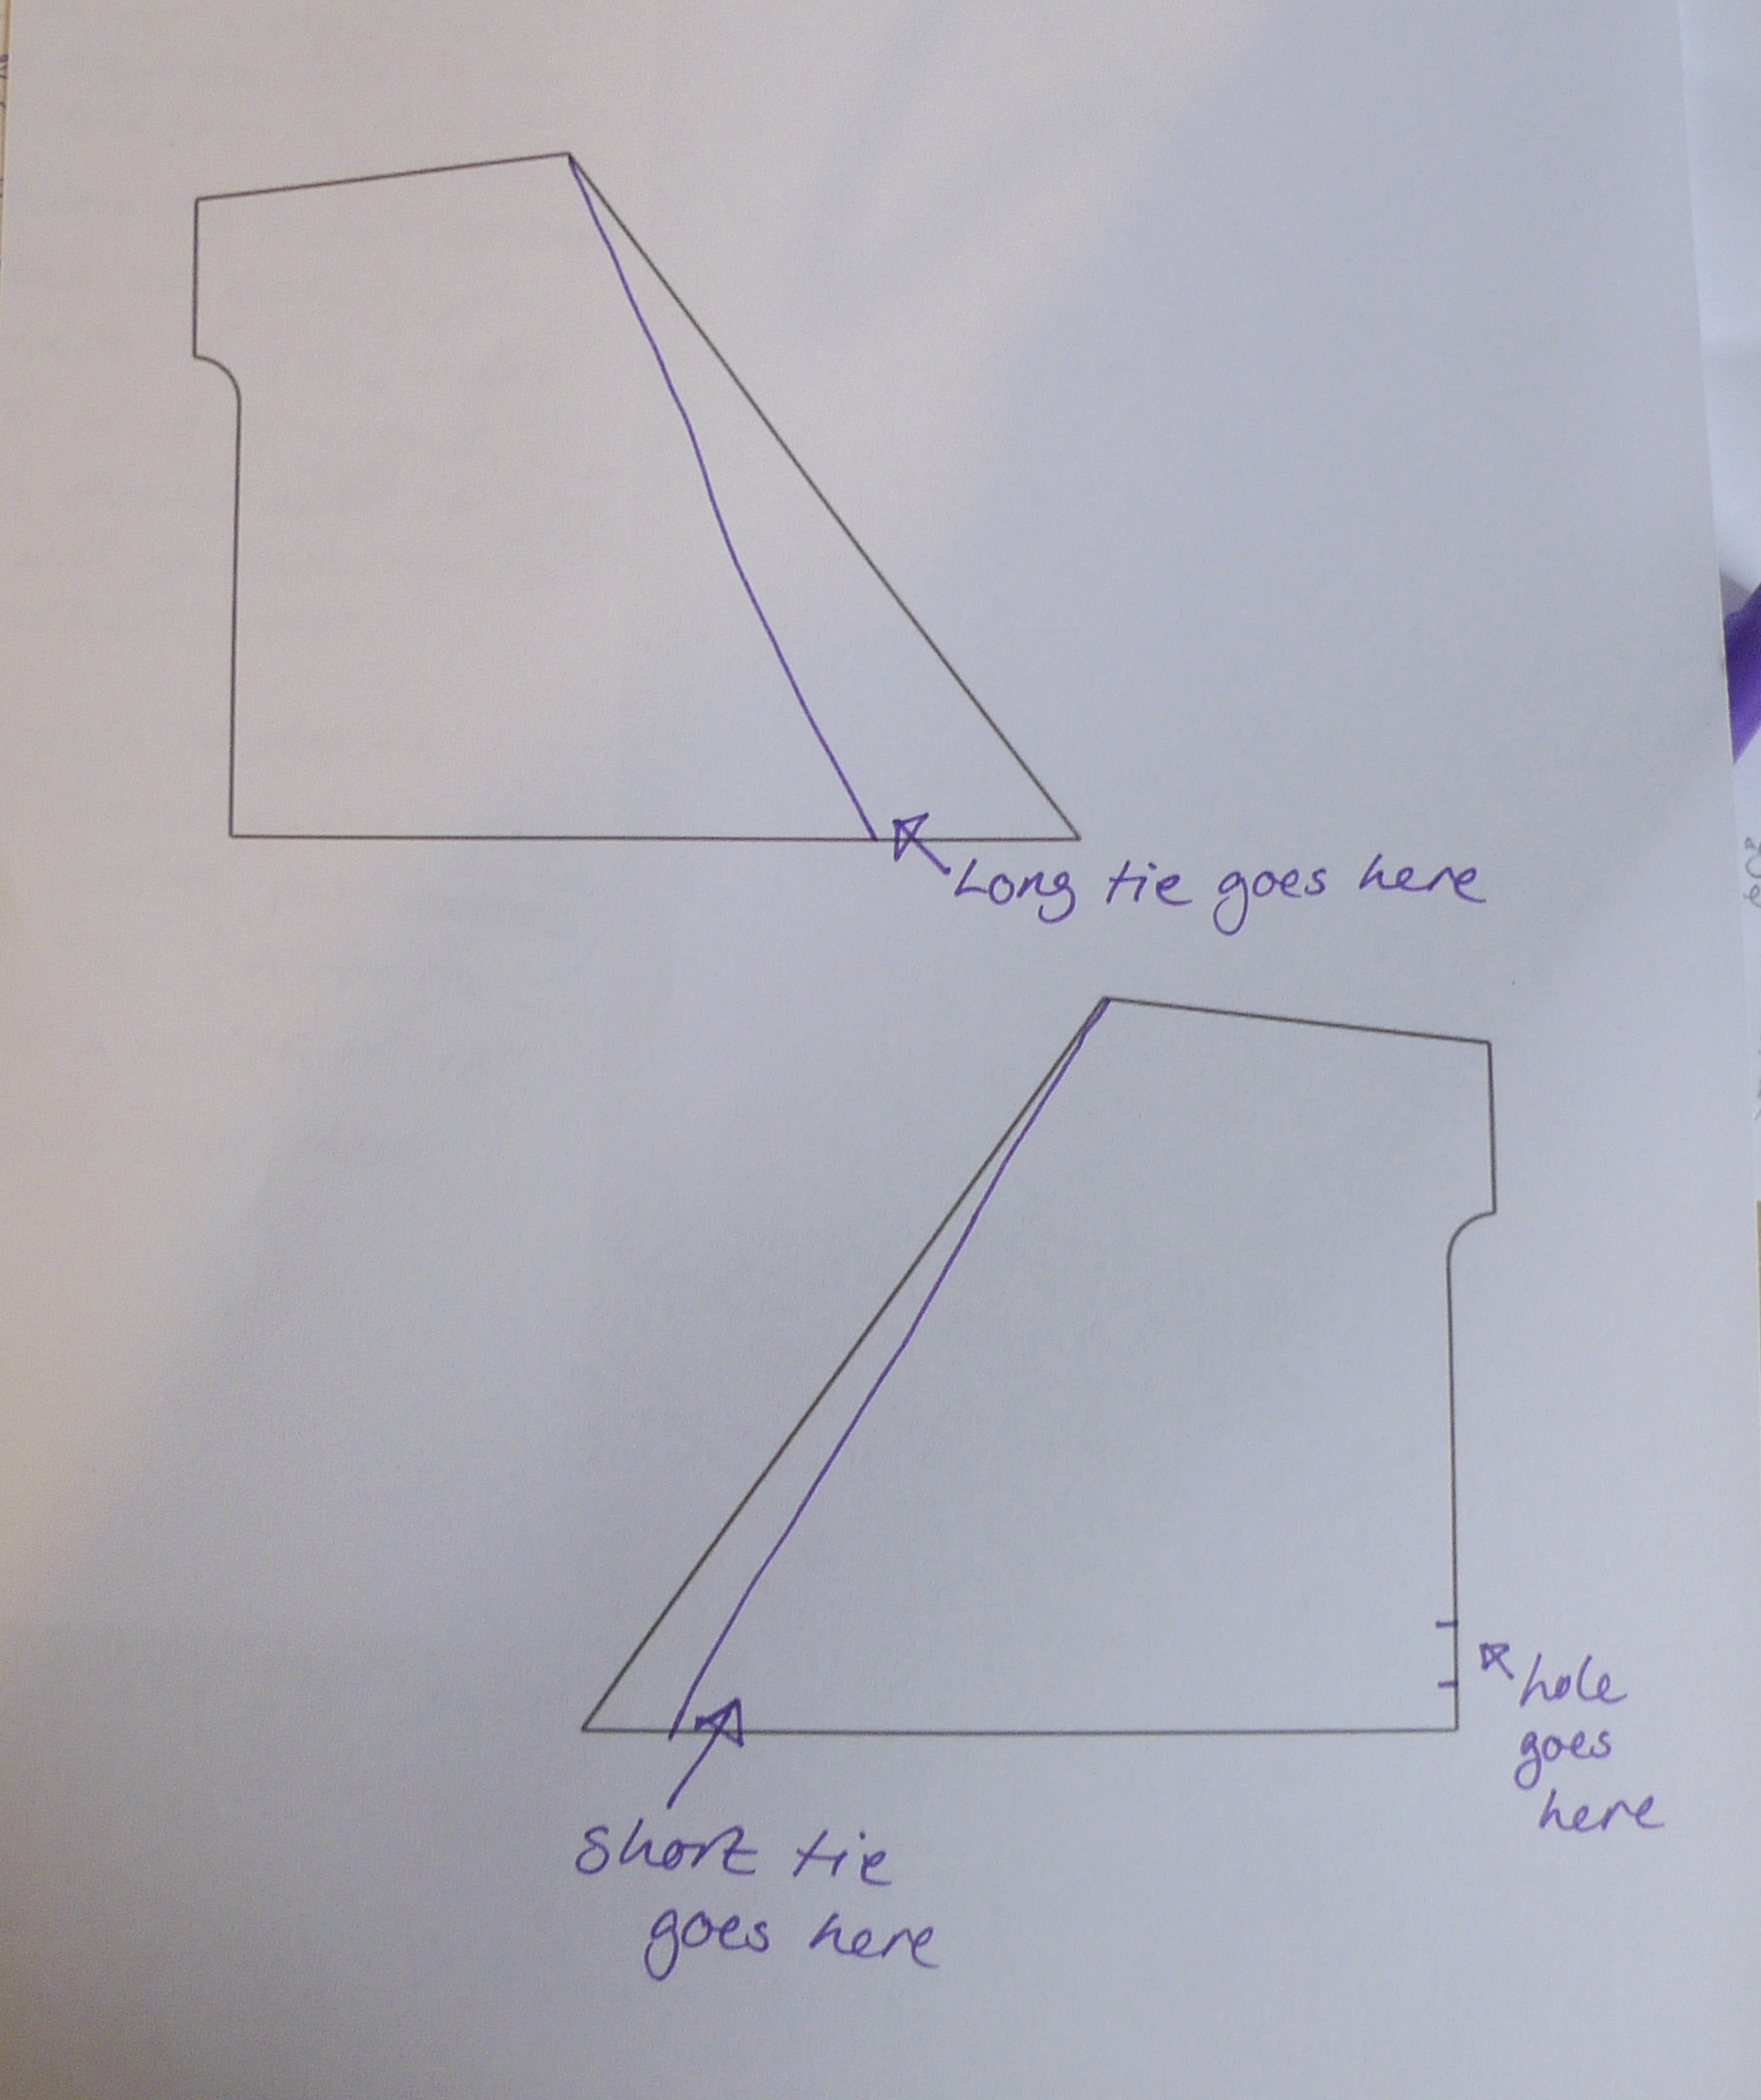
When you’re drawing the placement of the gap that the tie will go through, take into consideration your hem allowance. The original pattern doesn’t specify one, but I used a 2cm allowance. The gap should sit about 1cm above the bottom of the shirt once it’s hemmed, so I drew the bottom of the gap 3cm up from the base of the pattern piece. The waist ties will be 1″ wide, so I made the gap about 1.5″ high so they could fit through easily.
5- Now we’re going to draft the waist tie pieces. We want them to have a finished width of 1″, so the pattern pieces need to be 3″ wide (We’ll be folding them over, so that’s 2″, plus 1/2″ seam allowance on either side makes 3″ total).
Now to work out the length. To make a wrap top you need one longer tie and one shorter one. I think you need about 20” worth of tie to make a decent bow, so with that in mind, here’s how I worked out the length:
LONGER TIE: 1/2 your waist measurement + 20” + 1” for seam allowances.
E.g My waist measurement is about 24″, so my pattern piece was 33″ long (12″ + 20″ + 1″)
SHORTER TIE: Make the shorter tie 21″ long ( 20″ + 1″ combined seam allowances).
Your finished waist tie pieces should look something like this:

Now you can go ahead and cut into your fabric. Cut out one of each pattern piece.
Well done! Now we’re ready to start sewing!
1- Sew the shoulder seams with french seams, and also the seam connecting the shorter front wrap piece with the back.
2- Sew the longer front wrap piece to the back using a plain seam, making sure you don’t sew over the opening markings.
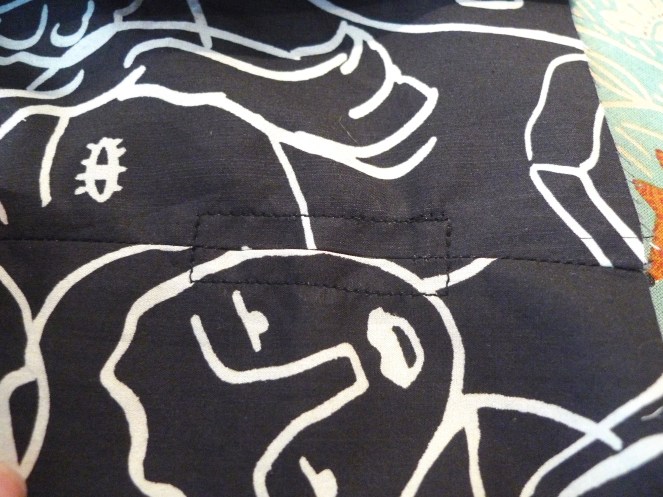
3- Finish the seam allowances separately and press them open. Topstitch around the opening in a rectangle, like so:

4- Hem all the raw edges as per the original instructions.
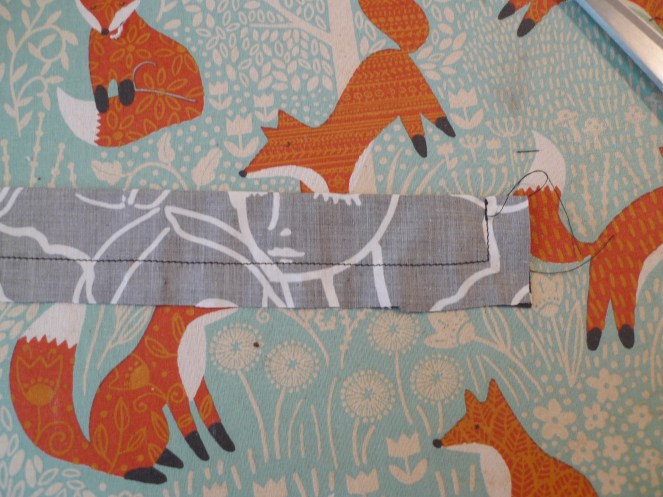
5- Now we’re going to make the ties: First, fold each tie in half lengthwise, right sides together, and press. Stitch down the long side and one of the short sides using a 1/2″ or 1.5cm seam allowance. Trim the seam allowances and turn the ties the right way out through the side you left unstitched. Press.


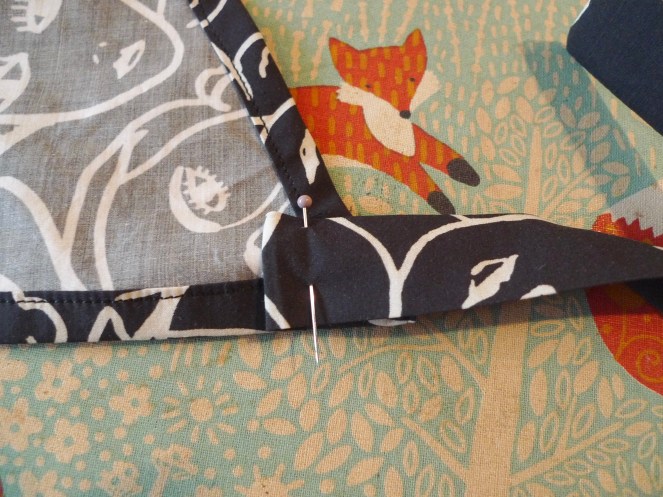
6- Before attaching the ties to the top, fold the raw edge of each tie to one side by about 1/2″ or 1.5cm. Then, pin each tie to its corresponding corner (if in doubt, check the illustration earlier in the post).

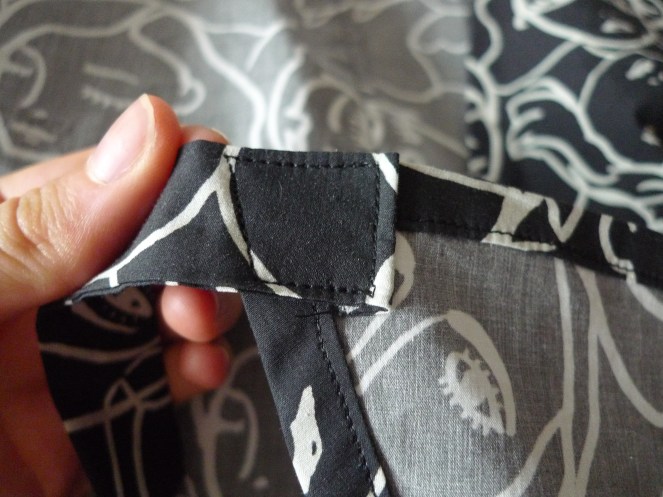
7- Topstitch the ties to the corners as neatly as you can. You’ll be sewing in a kind of irregular trapezium shape .

8- Finally, try the top on and mark where the two front wrap pieces overlap. Hand sew a popper fastening here, to stop the top from gaping.
Congratulations! You’ve made yourself a beautiful wrap top!

I hope you’ve enjoyed this tutorial and have made something you’re really proud of! If you have any questions feel free to leave me a comment down below 🙂
Happy sewing!

3 thoughts on “Sarah Kirsten’s Morning Glory top- Wrap hack tutorial”